
How To Level A Concrete Floor Before Installation
If you’re having new flooring, you’ll need to know how to level a concrete floor before installing further finishes like tiles, laminate, hardwood or carpet. If the concrete floor isn’t level, it can cause various problems further down the line, like more wear, a shorter lifespan and safety issues.
GB Concrete and Pump specialise in several services, including supplying and pumping for concrete floors, and is here with a clear guide on how to level a concrete floor.
Why Concrete Floor Levelling Is Important
Having a completely level concrete floor is crucial to avoid problems that can result in costly fixes. Level concrete floors prevent uneven installation of new floor coverings, and the adhesion of the coverings can also be compromised. Tiles, vinyl planks and wooden finishes require a completely flat concrete subfloor, otherwise cracks will appear and boards will easily separate.
A level concrete floor also means less structural stress, helping to extend the lifespan of the concrete subfloor, underlayment and the finish. Lumps, bumps and warped areas can lead to accidents, especially when the floor is there to support vehicles like forklifts, for example.
Signs Your Concrete Floor Needs Levelling
It may look level and even, but other key signs will show if your concrete floor needs levelling.
- Visible cracks in the floor:
A very obvious sign, cracks in a concrete floor can occur due to water infiltration, which is common with uneven concrete. - Visible dips and slopes:
Low spots, uneven areas or noticeable slopes across the floor can indicate the concrete has settled over time. These uneven surfaces can create trip hazards and make it difficult to install flooring properly. - Pooling water or moisture issues:
If water gathers in certain areas instead of draining evenly, it’s often a sign the floor is no longer level. Ongoing moisture problems can also lead to mould growth, surface damage and further weakening of the concrete. - Flooring lifting or movement:
Tiles, laminate, vinyl or wood flooring that shifts or separates may point to an uneven subfloor underneath. As the concrete moves or settles, the flooring above can become unstable and damaged.
Tools You Need To Level A Concrete Floor
If you need to level your concrete floor, you’ll require the right tools and materials to get a smooth, even finish. Some tools help you measure how uneven the floor is, while others are used to repair cracks, spread the compound and keep the area clean throughout the process.
- Spirit level or laser level – used to check how uneven the concrete floor is and identify any high or low spots.
- Concrete filler for any cracks or holes – ideal for repairing any visible damage in the concrete before applying the levelling compound.
- Self-levelling compound – a specially designed mixture that spreads across the floor to create a smooth, level surface.
- Concrete grinder or sander – used to smooth down raised areas or rough patches so the floor is as even as possible before levelling.
- Trowel and mixing paddle – a mixing paddle helps combine the levelling compound properly, while a trowel is used to spread and smooth it evenly.
- Primer and cleaning equipment – primer helps the levelling compound bond correctly to the concrete surface, and a broom, mop and cleaning cloths to remove dust and debris.
- Protective gear (gloves, goggles, mask) – essential for protecting yourself from dust and chemicals during preparation and levelling.
- Bucket – needed for mixing the self-levelling compound with water before application.
- Vacuum – helps remove fine dust and dirt from the concrete surface.
Step-By-Step Guide To Concrete Floor Levelling
1. Prepare The Area
To level a concrete floor, start off by clearing the area of any furniture, skirting boards and floor coverings. There’s likely to be dirt, dust and debris, so sweep and vacuum to remove these. A clean surface is essential, as any leftover dirt can affect how well the levelling compound bonds to the concrete.
2. Check For Moisture
Concrete floors must be dry before pouring the levelling compound. So, check for any moisture, which may require a moisture metre in some instances. If moisture levels are too high, it’s likely you’ll have to also install a damp-proof membrane or use a moisture barrier, both made from heavy-duty plastic to stop moisture migrating upwards from the damp earth to the concrete.
3. Inspect For Cracks Or Holes
Next, look for any cracks or holes. If there are any, repair them with a concrete filler and allow it to cure. You can then use your spirit level or laser level to assess how uneven the floor is using a spirit level or laser level, so you know which areas need the most attention.
4. Apply A Primer
Applying a primer helps the self-levelling compound stick properly to the concrete surface. Without primer, the compound may dry unevenly or fail to bond correctly.
Pour the primer directly onto the floor and spread it evenly and make sure the entire surface is covered. Allow it to fully dry before moving on to the next step.
5. Mix Self-Levelling Compound
Prepare the self-levelling compound by following the manufacturer’s instructions carefully. Usually, this involves mixing the powder with water in a large bucket and using a mixing paddle to combine.
It’s important to get the consistency right, as a mixture that’s too thick or too thin can affect the final result. Mix only the amount you can use within the recommended working time, as the compound can start setting quite quickly.
6. Spread And Smooth Compound
Pour the self-levelling compound onto the floor, starting at the lowest area first. The compound is designed to flow naturally across the surface, helping to fill dips and uneven sections.
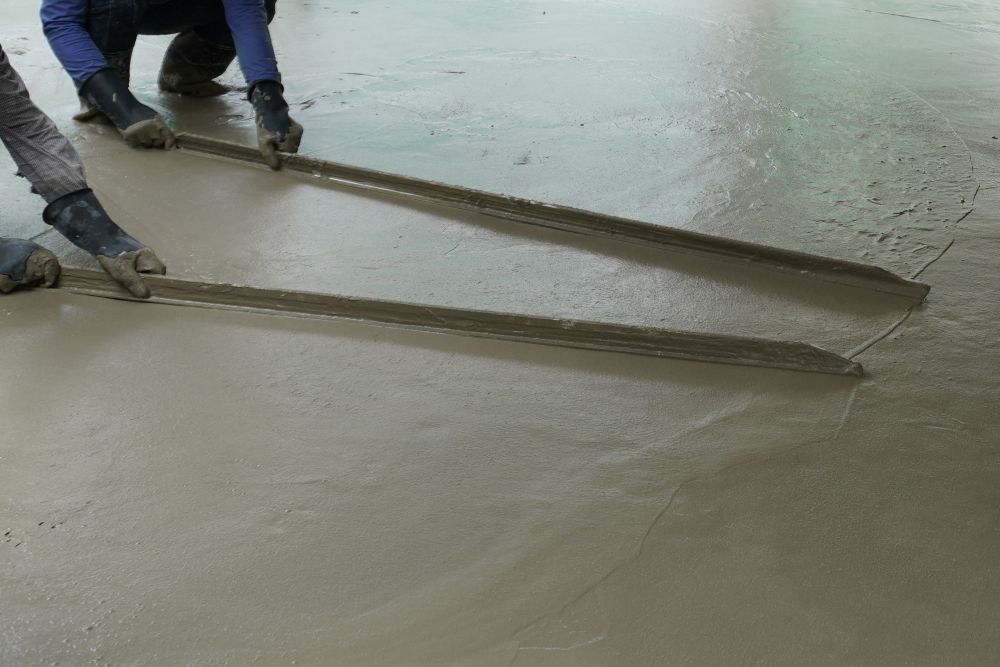
Use a smoothing trowel or gauge rake to spread the mixture evenly and remove any excess. You’ll need to work fairly quickly, as the compound can begin to harden within a short amount of time. For larger rooms, it may help to work in sections or grab an extra pair of hands, with one pouring, the other levelling.
7. Allow To Dry Fully
Once the compound has been applied, leave the floor undisturbed to dry and cure fully. Drying times can vary depending on the product used, room temperature and thickness of the application.
Avoid walking on the floor until it has fully set. After it has dried, check the surface again with a spirit level. If there are still uneven areas, a second coat of the levelling compound may be needed.
Tips For A Professional Finish
- Use high-quality products:
Using reliable primers, fillers and self-levelling compounds can make a big difference to the final result. Higher-quality products are usually easier to work with, bond better to concrete and provide a smoother, longer-lasting finish. - Follow the manufacturer’s instructions:
Always read and follow the instructions provided with your levelling compound and primer. This includes the correct mixing ratios, drying times and recommended application thickness, all of which ensure the floor levels properly. - Work in small sections:
Self-levelling compounds can begin to set quickly, so it’s often easier to work in small sections rather than trying to cover the whole floor at once. - Take your time:
Rushing the preparation or application process can lead to uneven results. Taking the time to clean the floor properly, repair damage and apply the compound carefully will help achieve a much smoother and more professional finish.
Levelling concrete floors takes a few key tools and steps to get right. But it needs to be done if you’ve got cracks, dips, bumps or built up moisture on your existing floor.
If you’re unsure where to start, the team at GB Concrete and Pump can help. Whether you need advice, concrete supply or support with your project, get in touch with our experienced team today.
FAQs
How long does a concrete floor take to level and dry?
Most self-levelling compounds become walkable within a few hours, but full drying and curing can take anywhere from 24 hours to several days depending on the product used. Drying times are affected by the thickness of the compound, room temperature, humidity levels and ventilation. Thicker applications will naturally take longer to fully cure.
In many cases, flooring can be installed and levelled after 24 to 72 hours, but it’s always best to check the manufacturer’s recommendations before laying tiles, laminate, vinyl or wood flooring.
What should the moisture level be for a concrete floor?
Concrete floors should have low and stable moisture levels before any levelling compound or flooring is installed. Excess moisture can lead to problems such as adhesive failure, mould growth, lifting flooring and damage to the finished surface.
A moisture metre can help identify whether the concrete is dry enough for levelling or flooring installation. If the moisture levels are too high, a damp-proof membrane or moisture barrier may be required to protect the floor long term.
Can you put self-levelling concrete over existing concrete?
Yes, in most cases a self-levelling compound can be applied directly over existing concrete as long as the surface is stable and properly prepared. The floor should be thoroughly cleaned, any cracks or holes filled and repaired, and a stable primer applied before levelling begins.
However, if the existing concrete is severely damaged, crumbling or structurally unstable, further repairs may be needed before a levelling compound can be safely applied. In some situations, replacing sections of concrete may be the better solution.
Popular Articles


